How to Build a Retaining Wall on a Slope: Stepped Footings & Terraces

By Efraín Vega · Published November 13, 2026
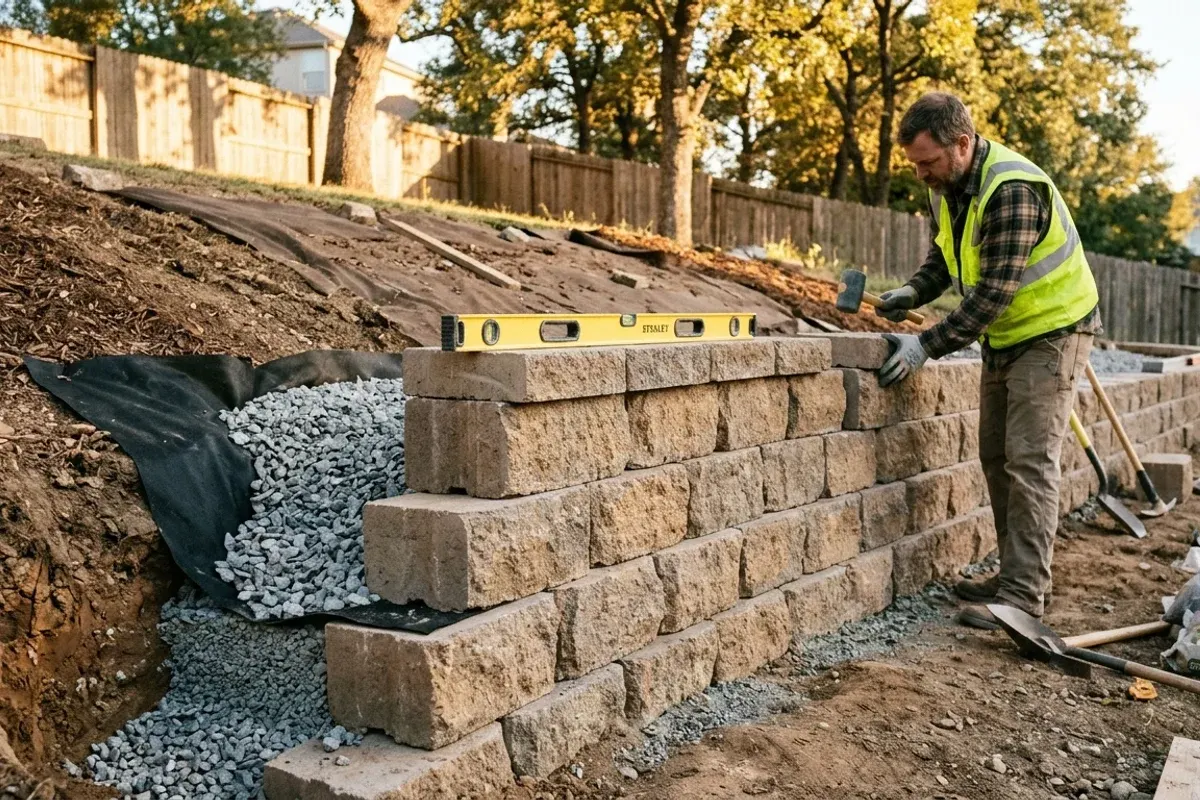
Building a retaining wall on a sloped yard is one of the most rewarding outdoor construction projects you can undertake. It transforms unusable, eroding hillsides into flat, functional patio terraces, garden beds, and usable yard space.
However, gravity and hydrostatic ground pressure multiply dramatically on a hillside. Without a properly stepped base trench, compacted aggregate pad, and continuous drainage chimney, a sloped retaining wall will lean, shear, or blowout after the first major storm cycle.
Follow this engineer-approved process to build a durable, freeze-thaw resistant segmental block retaining wall on any grade.
Retaining Wall Cross-Section on a Slope
Understanding how the internal layers interact is critical before breaking ground. Every retaining wall built into a slope functions as a complete drainage system:
    SLOPED HILLSIDE RETAINING WALL CROSS-SECTION:

                     Upper Sloped Grade (Surcharge)
                             /  ▲
                            /   │
                           /    │ Native Compacted
                          /     │ Earth Bank
                         /      │
    Cap Block ──────► [██]      │
    Course 4 ───────► [██] ░░░░ │ ◄── Non-Woven Geotextile Fabric
    Course 3 ───────► [██] ░░░░ │     (Separates stone from dirt)
    Course 2 ───────► [██] ░░░░ │
    Course 1 (Ground) [██] ░░░░ │ ◄── 12" Clean #57 Crushed Stone
    ───────────────────┬── ░░░░ │     (Drainage Chimney)
    Buried Base Block [██] ░(O)░│ ◄── 4" Perforated Drain Pipe
    ═══════════════════╧════════╪     (Holes facing down at 1% slope)
    Compacted Base (6" Road Base)
    ────────────────────────────
    Undisturbed Native Subsoil
1. Calculating Steps and Slope Ratios
When a hillside drops along the length of your proposed wall, you cannot dig one continuous flat trench without burying excessive blocks into the high side. Instead, you must step the trench horizontally like stair treads.
The Golden Rule of Stepped Footings:
The rise of each trench step must equal the exact height of one retaining wall block.
- If you use 6-inch blocks, make each step exactly 6 inches high.
- If you use 8-inch blocks, make each step exactly 8 inches high.
- Each level step (tread) should be at least 4 to 6 feet long to ensure multiple blocks bridge across the step transition.
       STEPPED BASE TRENCH ELEVATION PROFILE:

                            Upper Hillside Slope ───►
                                     ┌────────────────
                                     │ Step 3 (6" Rise)
                         ┌───────────┘
                         │ Step 2 (6" Rise)
             ┌───────────┘
             │ Step 1 (6" Rise)
   ──────────┘ ◄── Lowest Point (START EXCAVATION HERE)
| Slope Drop Over 30 Feet | Total Drop | Recommended Stepped Trench Layout |
|---|---|---|
| Mild (1:15 slope) | 24 inches | 4 steps of 6" rise, each tread approx 7.5 feet long |
| Moderate (1:10 slope) | 36 inches | 6 steps of 6" rise, each tread approx 5.0 feet long |
| Steep (1:6 slope) | 60 inches | Recommend 2 terraced walls (see Terracing section below) |
Calculate total block units, courses, and base materials using our Retaining Wall Calculator.
2. Excavation & Compacted Base Pad
Always begin digging at the lowest point of the slope. This guarantees that your base leveling pad sits on solid undisturbed native earth.
- Trench Width: Dig the trench twice the depth of your block from front to back. For a standard 12-inch deep block, excavate an 18- to 24-inch wide trench.
- Trench Depth: Dig down 6 inches for the gravel base pad + the height of your buried block course (6 to 8 inches) = 12 to 14 inches total depth.
- Compacting Subsoil: Run a mechanical plate compactor (or hand tamper for small jobs) over the raw subsoil. Never place stone over loose, freshly shoveled dirt.
- Base Gravel Installation: Fill the trench with 6 inches of dense-grade road base (crusher run with stone dust). Compact the stone in 2-inch lifts with a plate compactor. A properly compacted aggregate pad will not dent when you drive the heel of your boot into it.
Do NOT Use Rounded Pea Gravel for the Base
Base pads require angular aggregate with fines that mechanically lock together into a concrete-like footing. Rounded pea gravel rolls underfoot like ball bearings and causes uneven wall settlement. Size your aggregate needs accurately with our Gravel Calculator.
3. Laying the Base Course: The Critical First Row
Your base course dictates the alignment, plumb, and structural integrity of the entire finished wall. If your first row is out of level by 1/8 inch, the fourth row will be crooked by over an inch.
- Dead Leveling: Place your first block at the lowest step. Use a 2-foot or 4-foot torpedo level across the block in both directions: side-to-side (along the trench) and front-to-back.
- Rubber Mallet Adjustments: Tap high corners down using a heavy dead-blow rubber mallet. If a block is low, lift it, add a sprinkle of coarse sand or stone dust beneath it, and re-tap.
- Step Overlap: When reaching the end of a lower step, place the first block of the upper step so it overlaps the lower block by at least half a block width. This locks the stepped joint together and prevents vertical seam cracking.
4. Retaining Wall Drainage Chimney & Pipe
More than 90% of retaining wall failures stem from trapped water hydrostatic pressure. Solid clay holds water, weighing 120 lbs per cubic foot and acting like a hydraulic jack pushing against the back of the blocks.
                    DRAIN PIPE PLACEMENT:

           Retaining Blocks    Drainage Stone
               [████]       ░░░░░░░░░░░░░░░░
               [████]       ░░░░░░░░░░░░░░░░
               [████]       ░░░░ ┌───┐ ░░░░  ◄── 4" Perforated Pipe
               ──────       ░░░░ │(O)│ ░░░░      (2" above trench bottom)
             Base Gravel    ═════╘═══╛══════  ◄── Perforations pointing DOWN
- Geotextile Separation: Line the vertical native soil bank with non-woven needle-punched geotextile fabric. Do not use woven plastic weed barrier, which clogs easily.
- Perforated Drain Pipe: Place a 4-inch perforated PVC or heavy-duty corrugated pipe 2 inches above the leveling pad behind the first buried block course. Orient perforations facing DOWN. As water rises through the gravel, it enters the holes from below and flows out before saturating the upper courses.
- Slope to Daylight: Grade the pipe at a minimum 1% slope (1/8" per foot) toward the low end of the hillside, running the pipe end out past the end of the wall into a daylight pop-up emitter or splash basin. Calculate trench specs using our French Drain Calculator.
- Washed Aggregate Backfill: Fill the 12-inch void behind the blocks with washed angular #57 crushed stone (1/2" to 3/4"). Never substitute soil, sand, or crusher run in this 12-inch drainage zone.
5. Terracing Steep Slopes (The 2-Wall Rule)
Municipal building codes across the United States typically require a licensed structural engineer permit for any retaining wall that exceeds 4 feet in total height (including the buried course). Read our comprehensive guide on How High Can You Build a Retaining Wall Without an Engineer.
On tall, steep hillsides, building two terraced 3-foot walls is structurally superior, eliminates costly engineering fees, and provides beautiful multi-tiered planting beds.
       CORRECT TERRACE SETBACK RATIO:

                            Upper Slope ───►
                              ┌─────────┐
                              │ Wall 2  │ (Height = H2 = 3 ft)
                              │ (Upper) │
        ┌─────────────────────┴─────────┘
        │   ◄── Setback Distance (D) ──►
        │       (D MUST BE ≥ H1)
        │
   ┌────┴────┐
   │ Wall 1  │ (Height = H1 = 3 ft)
   │ (Lower) │
   └─────────┘
The Surcharge Loading Hazard:
If you place Wall 2 too close to Wall 1, the weight of the upper wall bears directly down onto the backfill of the lower wall (called a surcharge load). This will blow out the lower wall.
The Golden Terracing Formula:
Setback Distance (D) ≥ Height of the Lower Wall (H1)
If your lower wall is 3 feet high, your upper wall must be set back into the hillside at least 3 to 4 feet away from the back of the lower wall face.
6. Backfill, Compaction & Capstones
- Backfill in 6-Inch Lifts: As you lay each course of blocks, fill the 12-inch space directly behind the blocks with clean #57 stone, and fill behind the fabric with native soil. Compact the soil behind the fabric thoroughly before stacking the next course.
- Geogrid Reinforcement: If your wall is 3 to 4 feet tall and supporting an uphill slope, lay sheets of bi-axial geogrid between courses 2 and 3, extending at least 3 to 4 feet back into the hillside backfill.
- Soil Cap: Stop the drainage stone 4 to 6 inches below the top of the wall. Fold the filter fabric over the top of the stone column, then cap with topsoil or turf to prevent surface runoff from washing mud into the drainage rock.
- Adhere Capstones: Sweep all dust and grit off the top block course. Apply two thick 1/4-inch beads of heavy-duty polyurethane landscape block adhesive (such as Loctite PL Premium) and firmly press each capstone into position.
Related Guides & Calculators
- Retaining Wall Calculator — Calculate block quantities, base aggregate, and backfill stone.
- Retaining Wall Drainage: Gravel, Pipe & Fabric — Comprehensive fluid dynamics and hydrostatic pressure calculations.
- How High Can You Build a Retaining Wall Without an Engineer — International Building Code (IBC) guidelines and permit thresholds.
- Gravel Calculator — Convert linear trench dimensions into cubic yards and tons.
- French Drain Calculator — Sizing hillside groundwater collection trenches.
FAQ
How do you step a retaining wall footing down a hillside slope?
Dig your base trench in horizontal, level stepped tiers. Each step must equal exactly the height of one block (typically 6 or 8 inches) so the courses running from the lower section meet and overlap the upper step smoothly without shimming or uneven mortar joints.
Where should you start building a retaining wall on a slope?
Always start at the lowest point of the slope. Setting and leveling your first base blocks at the deepest trench section establishes the baseline elevation for all subsequent tiers stepping up the hillside.
How much of a retaining wall must be buried underground?
Bury at least 1 inch of block for every 1 foot of total wall height, with a strict minimum of one full course (6 to 8 inches) buried below finished ground grade. On steep downhill slopes, increase burial depth to prevent soil slippage beneath the base pad.
When should you terrace a slope instead of building one tall retaining wall?
If a slope requires more than 4 feet of retention, building two stepped 3-foot terraced walls is safer, more attractive, and avoids costly municipal structural engineer permits. The upper wall must be set back from the lower wall by a distance at least equal to the height of the lower wall (Setback ≥ H1) to prevent surcharge loading.
What gravel should you use for the base pad versus the backfill?
Use dense-grade aggregate with fines (crushed stone road base or crusher run) for the 6-inch leveling pad because it compacts into a rock-solid, impenetrable foundation. For the 12-inch backfill drainage chimney behind the blocks, use clean, washed, angular #57 crushed stone with no fines so water drains instantly down to the perforated pipe.
Do you need geogrid on a retaining wall built on a slope?
Yes, whenever the wall exceeds 3 feet in total height, or if the soil above the wall continues to slope upward (a slope surcharge). Geogrid sheets extend back into the hillside soil, locking the block face to the soil mass to counteract sliding and overturning force.