How to Build a DIY U-Shaped Raised Garden Bed (Keyhole Layout)

By Efraín Vega · Published November 16, 2026
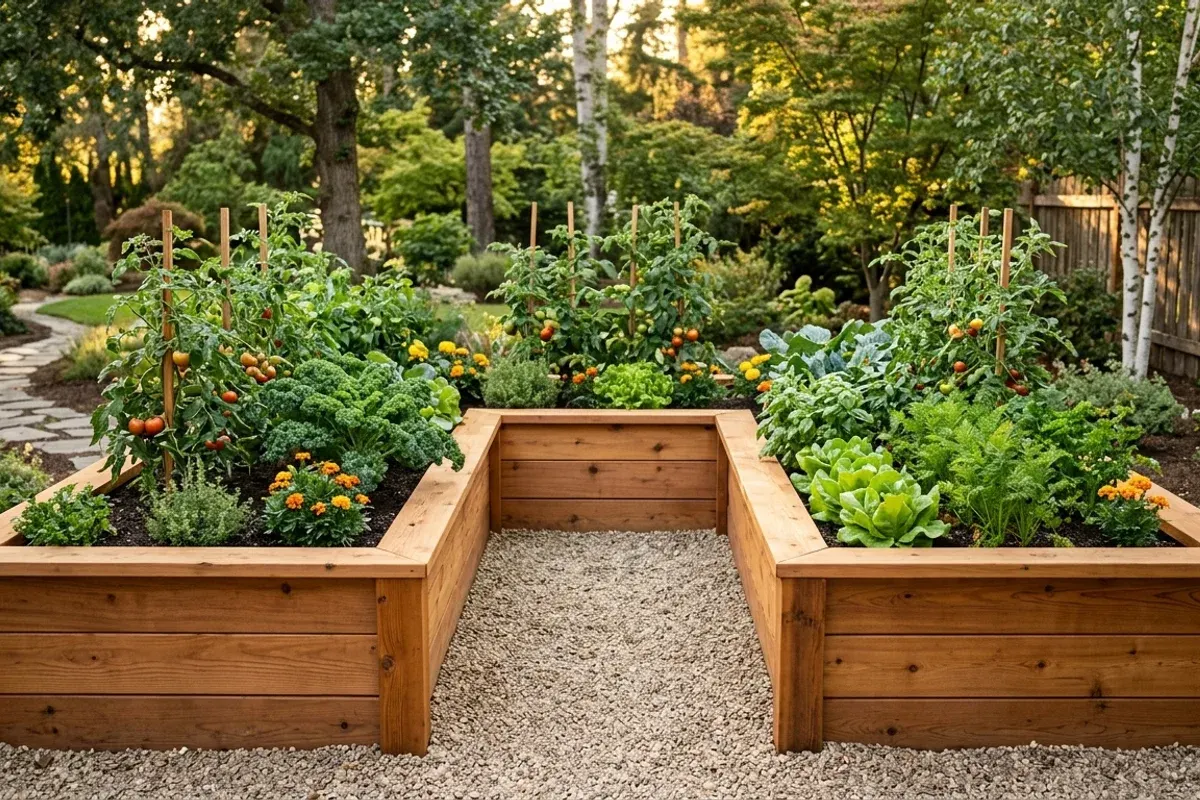
If you are looking to maximize your vegetable harvest while creating an architectural centerpiece in your backyard, a U-shaped (or horseshoe) raised garden bed is the premier design.
Unlike traditional rectangular raised beds separated by multiple narrow paths, a U-shaped bed curves around a central standing alcove. You step into the center of the bed and find yourself surrounded on three sides by lush, productive greenery—with every single plant within effortless arm's reach.
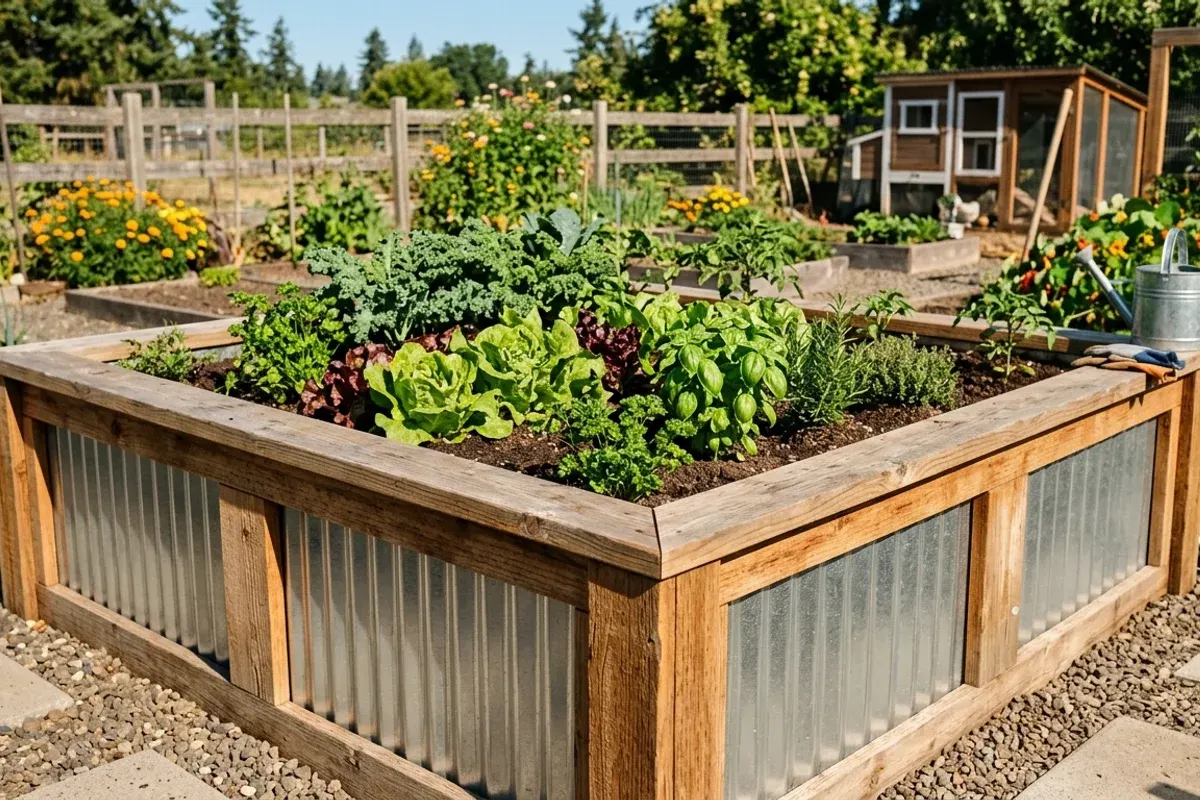
By constructing your bed from 2x10 Western red cedar with internal 4x4 corner posts, anti-bow structural tie rods, and a wide 2x6 top cap seating ledge, you create a rot-proof structure built to last 20+ years.
Use our Raised Bed Lumber Calculator and Raised Bed Soil Calculator to verify board and soil takeoffs.
Ergonomics & Dimensions: The 8×8 vs. 10×10 Layout
The secret to a successful U-shaped bed is respecting the 3-Foot Rule of Reach Ergonomics. An adult gardener can comfortably reach 36 inches into a bed without straining their lower back or placing knees on the soil:
┌─────────────────────────────────────────────────────────────────┐
│              8×8 FT U-SHAPED RAISED BED PLAN VIEW               │
├─────────────────────────────────────────────────────────────────┤
│                  ◄──────── 8'-0" (96") ────────►                │
│   ┌─────────────────────────────────────────────────────────┐   │
│   │               BACK PLANTING WING (30" Deep)             │   │
│   ├───────────────┬─────────────────────────┬───────────────┤   │
│   │               │                         │               │   │
│   │  LEFT WING    │     CENTRAL ALCOVE      │  RIGHT WING   │   │
│ ▲ │  (30" Wide)   │     WALKWAY (36" W)     │  (30" Wide)   │ ▲ │
│ │ │               │                         │               │ │ │
│8' │               │   Crushed Pea Gravel    │               │8' │
│ │ │               │   or Mulch Footpath     │               │ │ │
│ ▼ │               │                         │               │ ▼ │
│   │               │                         │               │   │
│   └───────────────┘                         └───────────────┘   │
│   ◄─── 30" ───►   ◄──────── 36" ────────►   ◄─── 30" ───►       │
│                                                                 │
│   ▲               ▲                         ▲               ▲   │
│   Post 1          Post 2                    Post 3          Post 4
└─────────────────────────────────────────────────────────────────┘
Key Dimensional Specifications:
- Outer Footprint: 8'-0" Wide × 8'-0" Deep (96" × 96").
- Wing Width: 2'-6" (30 inches). Allows thorough access from both inside the alcove and the outer yard.
- Center Alcove Width: 3'-0" (36 inches). Generously fits a standing gardener, harvest baskets, and a folding garden stool.
- Alcove Depth: 5'-6" (66 inches).
- Bed Height: 18-1/2 inches (two stacked courses of 2x10 S4S cedar, actual 9-1/4" width).
Materials & Lumber Schedule (8×8 Footprint)
Western red cedar is the gold standard for raised beds: its natural thujaplicin oils resist fungal rot and wood-boring insects without chemical pressure-treatments.
Lumber Schedule (20-Inch Finished Height)
| Component | Quantity | Nominal Size | Finished Length | Material Specification |
|---|---|---|---|---|
| Outer Long Sides | 4 | 2x10 | 96" (8 ft) | Western Red Cedar S4S (2 boards stacked per side) |
| Back Wall | 4 | 2x10 | 96" (8 ft) | Western Red Cedar S4S (2 boards stacked) |
| Front Wing Faces | 4 | 2x10 | 30" | Western Red Cedar S4S (2 per wing end) |
| Inner Alcove Sides | 4 | 2x10 | 66" (5.5 ft) | Western Red Cedar S4S (2 boards stacked per side) |
| Inner Alcove Back | 2 | 2x10 | 36" (3 ft) | Western Red Cedar S4S (2 boards stacked) |
| Internal Corner Posts | 8 | 4x4 | 18" | Western Red Cedar S4S (Placed at all 8 corners) |
| Perimeter Seating Cap | 10 | 2x6 | Various | Western Red Cedar S4S (Mitered 45° at corners) |
Hardware & Sub-Base Fasteners
- Wood Framing Screws: 5 lbs of #10 × 3-1/2" exterior ceramic-coated star-drive screws (GRK R4 or Simpson Strong-Tie).
- Top Cap Screws: 2 lbs of #9 × 2-1/2" trim-head exterior stainless steel screws (driven through the top or pocket-screwed from below).
- Anti-Bow Structural Tie Rods: 2 × 3/8" × 36" hot-dipped galvanized threaded steel rods, complete with 4 oversized fender washers and 4 nylon-insert locknuts.
- Gopher & Mole Defense: 1 roll (48" × 50') of 1/2-inch galvanized 19-gauge steel hardware cloth.
- Geotextile Pathway Fabric: Heavy-duty 4 oz non-woven landscape fabric for the central alcove.
Step 1: Site Preparation & Leveling
Because a U-shaped bed has 8 interrelated corners, starting on a level foundation is essential. If one corner is 2 inches low, the top cap miters will not close cleanly.
- Mark the 8×8 Footprint:
- Drive four stakes at the outer corners (96" × 96"). Check square by measuring diagonals: both must measure 135-3/4 inches (11 feet 3-3/4 inches).
- Remove Turf & Excavate Shallow Trench:
- Strip grass and sod inside the footprint.
- Dig a 3-inch deep, 6-inch wide perimeter trench along the line of all bed walls.
- Establish a Crushed Stone Leveling Base:
- Add 2 inches of crushed angular limestone or gravel (#57 stone or gravel screenings) into the trench.
- Tamp firm and check level with a 4-foot spirit level. Setting the bottom cedar boards on stone prevents direct soil contact and extends lumber lifespan by 5+ years.
Step 2: Assembling the Outer Perimeter Frame
┌─────────────────────────────────────────────────────────┐
│               CORNER POST FASTENING DETAIL              │
├─────────────────────────────────────────────────────────┤
│   Top View of 90° Corner:                               │
│                                                         │
│          2x10 Outer Side Board                          │
│          ═════════════════════════════════►             │
│   ┌──────┬───────────────────────────────┐              │
│   │ 4x4  │                               │              │
│   │ Post │ ◄── #10 x 3-1/2" Screws       │              │
│   │      │     (Pre-drilled & Staggered) │              │
│   ├──────┤                               │              │
│   │      │                                              │
│   ▼      ▼                                              │
│   2x10 Front/End Board                                  │
└─────────────────────────────────────────────────────────┘
- Pre-Cut Corner Posts:
- Cut eight 4x4 posts to 18 inches long (1/2 inch shorter than the stacked 2x10s so the top cap seats flat).
- Build the Lower Tier:
- Lay the 8-foot back wall board and two 8-foot side wall boards in the trench.
- Fasten each board into the corner 4x4 posts using three #10 × 3-1/2" screws per joint. Always pre-drill with an 1/8-inch bit to prevent splitting the cedar near board ends.
- Stack the Upper Tier:
- Place the second row of 2x10 boards directly on top of the first.
- Stagger screw locations into the 4x4 post to avoid hitting screws from the lower tier.
Step 3: Framing the Inner Alcove Walls
The inner alcove notch gives the bed its signature U-shape.
- Set the Front Wing Faces:
- Attach the two 30-inch front face boards across the front ends of the outer side walls, securing into corner posts.
- Position the Inside Alcove Posts:
- Place 4x4 posts at the two inside front corners and the two inside back corners (see diagram above).
- Fasten the 66-Inch Inner Side Walls:
- Install the two 66-inch 2x10 boards running parallel to the outer walls, spaced exactly 30 inches inward.
- Cap the Inner Back Wall:
- Install the 36-inch cross board at the back of the alcove.
- Verify that the central walkway measures exactly 36 inches wide from front to back.
Step 4: Installing the Anti-Bow Structural Tie Rods
A 66-inch to 96-inch span of 2x10 wood filled with damp soil will bow outward by 1 to 2 inches within the first growing season if unrestrained.
┌─────────────────────────────────────────────────────────┐
│             ANTI-BOW THREADED TIE ROD DETAIL            │
├─────────────────────────────────────────────────────────┤
│   Left Outer Wall                     Left Inner Wall   │
│   2x10 Cedar                          2x10 Cedar        │
│   │                                   │                 │
│   ├─[Nut]                             ├─[Nut]           │
│   ├─[Fender Washer]                   ├─[Fender Washer] │
│   │   ═════════════════════════════   │                 │
│   │   3/8" Galvanized Threaded Rod    │                 │
│   │   (Spans 30" Through Garden Soil) │                 │
│   │                                   │                 │
│   ◄──────── 30" Planting Wing ───────►                  │
└─────────────────────────────────────────────────────────┘
- Mark Midpoint:
- At the midpoint of each 66-inch inner alcove wall (33 inches from the front), mark a point 9 inches above the ground (between the lower and upper 2x10 boards).
- Drill Clearance Holes:
- Drill a 7/16-inch hole through both the outer 2x10 wall and the matching inner 2x10 wall.
- Insert Threaded Rod:
- Slide a 3/8-inch hot-dipped galvanized threaded steel rod through both walls.
- Slip an oversized galvanized fender washer and nylon locknut on each exterior end.
- Tighten until the washers pull flush against the cedar face. When the bed is filled, soil covers the rod completely, locking the walls parallel permanently.
Step 5: Hardware Cloth & Pathway Base
- Gopher & Burrowing Pest Barrier:
- Roll 1/2-inch galvanized hardware cloth across the entire dirt floor inside the planting wings.
- Run the wire mesh 3 inches up the inside wooden walls and secure every 6 inches with 3/8-inch heavy-duty stainless steel staples. This stops burrowing voles, moles, and gophers from tunneling up into your root crops.
- Central Alcove Flooring:
- Line the 3×5.5 ft center alcove floor with heavy non-woven geotextile fabric.
- Spread 2 inches of crushed pea gravel or bluestone chips (calculate with our Gravel Calculator). A clean gravel alcove ensures mud-free harvesting during rainy weather.
Step 6: Mitering & Mounting the 2x6 Seating Top Cap
A 2x6 perimeter top cap serves two essential functions: it ties the inner and outer walls together into a rigid unified beam, and it provides a comfortable 5-1/2-inch wide bench to sit on while thinning seedlings or picking beans.
- Miter Corners at 45 Degrees:
- Cut your 2x6 cedar boards with 45-degree miter cuts at each of the 8 exterior and interior corner turns.
- Allow a 1/2-inch overhang extending into the bed and outward over the side walls.
- Fasten to Posts and Planks:
- Pre-drill pilot holes from the top surface and drive #9 × 2-1/2" trim-head exterior stainless screws into the top edge of the 2x10 planks and 4x4 posts.
- Alternatively, pocket-screw from underneath for a fastener-free top surface.
- Round Sharp Edges:
- Run a 1/8-inch roundover router bit or 120-grit sandpaper over all exposed top cap edges to prevent splinters.
Soil Fill Strategy: The Hügelkultur Layering Method
Filling a 20-inch deep U-shaped bed with 100% bagged potting mix is unnecessarily expensive ($300+ in bagged soil). Use the time-tested Hügelkultur 4-Layer Fill to save 40% to 50% on soil costs while improving moisture retention:
┌────────────────────────────────────────────────────────┐
│           HÜGELKULTUR RAISED BED SOIL LAYERS           │
├────────────────────────────────────────────────────────┤
│ 4" Topsoil Blend: 40% Compost, 40% Peat/Coir, 20% Perlite│
│ ══════════════════════════════════════════════════════ │
│ 4" Nutrient Layer: Aged Manure & Rotted Leaves (Browns)│
│ ══════════════════════════════════════════════════════ │
│ 4" Biomass Layer: Tree Branches, Twigs & Garden Debris │
│ ══════════════════════════════════════════════════════ │
│ 6" Base Layer: Hardwood Logs (Oak, Maple, Birch)       │
│ ══════════════════════════════════════════════════════ │
│ 1/2" Galvanized Hardware Cloth (Gopher Shield)         │
└────────────────────────────────────────────────────────┘
- Bottom 6 Inches (Base Logs): Fill the bottom with decaying hardwood logs (oak, maple, or alder). As logs break down over 5–10 years, they act like an underground sponge, storing deep moisture that plant taproots tap into during dry summer heat.
- Next 4 Inches (Branches & Sticks): Pack medium-sized tree limbs and woody prunings to fill gaps between the logs.
- Next 4 Inches (Organic Biomass): Shovel in shredded fall leaves, unfinished compost, straw, or grass clippings to filter down between the wood.
- Top 8 to 10 Inches (Finished Growing Blend): Fill the root zone with high-grade raised bed mix: 40% aged compost, 40% coconut coir or peat moss, and 20% coarse perlite or pumice for aeration.
Calculate your exact yardage with our Raised Bed Soil Calculator.
Intelligent Plant Spacing in a U-Shaped Bed
To ensure every plant receives adequate sunlight without shading out smaller companions, follow the North-South Sun Hierarchy:
| Bed Section | Sunlight Exposure | Best Vegetable & Herb Crops | Staking / Trellis Requirements |
|---|---|---|---|
| Back Wing (North Side) | Maximum Full Sun | Indeterminate Tomatoes, Pole Beans, Sweet Corn, Sunflowers | Mount vertical cattle panels or string trellises along the back rim so tall foliage never blocks the south sun. |
| Side Wings (East & West) | Morning & Afternoon Sun | Bell Peppers, Eggplants, Kale, Cabbages, Broccoli | Heavy cages or sturdy bamboo stakes to support heavy fruit load. |
| Inner Alcove Perimeter | Partial Shelter & Easy Reach | Strawberries, Bush Beans, Basil, Parsley, Cut-and-Come-Again Lettuce | Zero staking required; keep low to allow effortless harvesting straight into kitchen bowls while standing inside. |
| Front Wing Faces (South Edge) | Maximum Ground Heat | Bush Cucumbers, Radishes, Carrots, Marigolds, Nasturtiums | Direct sow root crops and beneficial companion flowers that spill decoratively over the front cedar ledge. |
Related Building Guides & Calculators
- Raised Bed Lumber Calculator: Get exact board counts and pricing for custom bed layouts.
- Raised Bed Soil Calculator: Calculate cubic yards, cubic feet, and bag counts for any bed dimension.
- How to Build a Corrugated Metal Raised Bed: Combine cedar framing with rot-proof galvanized steel panels.
- Hügelkultur Raised Bed Soil Layers: Deep-dive into log layering and microbial compost biology.
- Best Wood for Raised Beds: Compare Western red cedar, redwood, cypress, and treated pine.
FAQ
What are the ideal dimensions for a U-shaped raised garden bed?
The most popular and ergonomically sound footprint is 8 feet wide by 8 feet deep (or 10x10 for larger yards). The two side planting wings and the back connecting wing should be 2.5 to 3.0 feet wide (30 to 36 inches). This leaves a comfortable 3-foot wide (36-inch) central walking alcove where a gardener can access every plant without stretching past their natural 3-foot reach.
How deep should a U-shaped raised bed be?
A finished depth of 18 to 20 inches (two tiers of nominal 2x10 cedar boards) is the sweet spot. It provides generous rooting depth for deep-rooted crops like tomatoes and parsnips while significantly reducing bending and kneeling fatigue. It also places the top cap at an ideal height for sitting while weeding.
How do you prevent the long walls of a U-shaped bed from bowing outward?
Wet garden soil exerts hundreds of pounds of outward hydrostatic pressure against long bed walls. For any wall section exceeding 6 feet, install an anti-bow tie rod: drill through opposite 4x4 posts or vertical 2x4 cleats at mid-height, pass a 3/8-inch threaded galvanized steel rod through both walls, and tighten with oversized fender washers and locknuts before adding soil.
How much soil does an 8x8 U-shaped raised bed need?
An 8x8 ft U-shaped bed with 3-foot wings and a 20-inch depth holds approximately 55 square feet of growing area and requires about 3.4 cubic yards (92 cubic feet) of soil. To save 40% on soil costs, fill the bottom 8 to 10 inches with rotting hardwood logs and dry branches using the Hügelkultur layering method.
What are the advantages of a U-shaped bed over separate rectangular beds?
A U-shaped (horseshoe) layout maximizes usable planting area within a compact square footprint while eliminating dead perimeter pathway space. It centralizes your drip irrigation loop, creates a warm, wind-protected microclimate inside the center alcove, and allows you to harvest an entire week's produce from a single standing position.