How to Winterize and Blow Out Drip Irrigation Lines (Step-by-Step)

By Efraín Vega · Published October 28, 2026
When sub-freezing temperatures arrive, water trapped inside polyethylene drip tubing, micro-emitters, and expensive brass backflow preventers expands by roughly 9% in volume. Without proper winterization, that pressure fractures brass valve castings, blows barbed fittings off tubing, and ruptures internal emitter diaphragms.
Whether you manage raised garden beds, hedge drip lines, or patio containers, this guide walks through the exact steps to blow out or gravity-drain your irrigation system before the ground freezes solid.
2 Ways to Winterize: Gravity Drain vs. Air Blowout
The right method depends on your landscape slope and garden layout:
Method A: Gravity Draining (Simple Sloped Systems)
If your garden beds sit below the main outdoor spigot and your lines run downhill without deep underground dips, gravity draining works well without an air compressor:
- Shut off the water supply valve inside your basement or crawlspace.
- Open the main outdoor hose bibb or faucet completely.
- Unscrew the figure-8 end clamps or flush caps at the lowest point of every lateral line.
- Let the system drain by gravity for 30 minutes, then roll up tubing or leave the ends open over winter so remaining moisture has room to expand safely.
Method B: Compressed Air Blowout (Flat Beds or Buried Lines)
If your drip lines snake across level ground or dip under walkways, standing water collects in low pockets and will freeze. Air blowout is the industry standard for complete freeze protection.
To design or reconfigure your garden tubing runs next spring, check our Drip Irrigation Calculator.
The Air Compressor Blowout Procedure
Unlike commercial rotor sprinkler systems that handle 75 to 80 PSI, drip irrigation requires low-pressure air. Exceeding pressure limits will launch push-in emitters out of 1/2" poly tubing like projectiles.
Tool Checklist
- Air compressor with a pressure regulator dial.
- Quick-connect hose blowout adapter (threaded 3/4" male hose thread to 1/4" air quick-connect plug).
- Protective eyewear.
Step-by-Step Instructions
-
Isolate the Indoor Water Supply: Close the indoor irrigation isolation valve. Open the small brass bleeder cap on the valve body into a bucket to empty any trapped water behind the exterior wall.
-
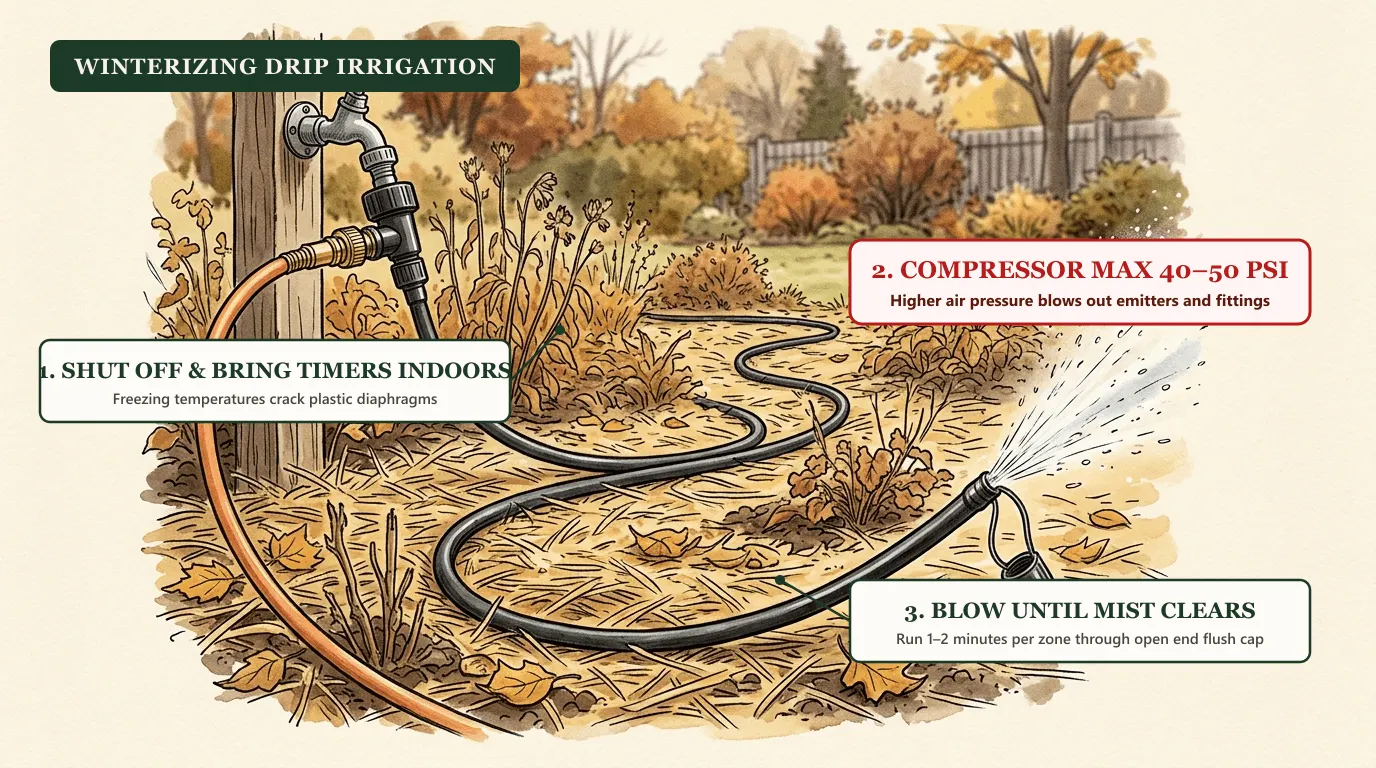
Remove Fragile Upstream Components: Drip regulators, mesh screen filters, and digital battery timers cannot withstand high-volume compressed air. Unscrew them from the faucet assembly before attaching the air hose.
-
Set the Compressor Regulator to 40–50 PSI (Strict Maximum): Never connect an unregulated air tank. Lock the output pressure between 40 and 50 PSI. Drip lines rely on air volume (CFM), not extreme pressure, to purge water.
-
Thread the Blowout Adapter onto the Drip Zone: Attach your air hose to the drip zone inlet.
-
Open Zone Flush Ends One at a Time: Open the terminal end cap of the first lateral zone. Engage the air compressor. A heavy spray of water will exhaust from the end. Run the air for 1 to 2 minutes until only fine mist and air exit the pipe.
-
Close and Repeat: Cap the cleared zone, move to the next lateral branch, and repeat the blowout. Never run air continuously through dry plastic lines for more than 2 minutes, as friction heat can soften and deform polyethylene tubing.
Winterizing Automatic Hose Timers & Backflow Preventers
More irrigation systems are ruined by frozen faucet timers and backflow valves than by burst poly lines. Follow these safeguards:
- Digital Timers (Orbit, B-hyve, Rain Bird): Bring battery-operated hose timers indoors. Freezing water inside the miniature solenoid cracks the valve chamber, and sub-zero temperatures ruin LCD displays and drain alkaline batteries. Remove batteries before winter storage to prevent acid corrosion.
- Backflow Preventers (PVB or RPZ Units):
If you have an above-ground pressure vacuum breaker (PVB) installed outdoors:
- Shut off the upstream isolation ball valve.
- Open all petcocks (test cocks) using a flathead screwdriver and position the ball-valve handles at a 45-degree angle.
- Leaving ball valves halfway open prevents water from remaining trapped between the chrome ball and the brass valve body casing.
What to Do with In-Line Emitters and Soaker Hoses
- Pressure-Compensating (PC) Drippers: Standard blowouts clear PC drippers effectively. Ensure you run air until all emitters stop spitting water droplets.
- Porous Soaker Hoses: Soaker hoses made from recycled rubber crumble if frozen while saturated. After draining, roll them into loose coils and hang them on garage wall hooks out of direct sunlight and snow contact.
- Topsoil Protection: Once lines are winterized, protect soil micro-organisms and dormant perennial roots by laying 2 to 3 inches of clean organic mulch using our Mulch Calculator.
FAQ
Can you blow out drip irrigation with an air compressor?
Yes, but you must regulate pressure to 40–50 PSI maximum. High pressure used for traditional turf sprinklers (80+ PSI) will pop barbed fittings off poly tubing and blow out drip emitters.
Do you have to drain drip irrigation lines for the winter?
Yes. In freezing climates, trapped water expands as it turns to ice, cracking brass backflow preventers, splitting plastic pressure regulators, and damaging internal emitter diaphragms.
Should drip irrigation timers stay outside during winter?
No. Digital battery timers must be removed, have their batteries removed, and be stored indoors. Freezing water inside the solenoid ruptures internal plastic chambers.
How long should you blow out a drip irrigation line?
Run compressed air through each zone for 1 to 2 minutes until only a fine mist exits the open flush ends. Never run dry air for more than 2 minutes at a time to prevent friction heat damage.